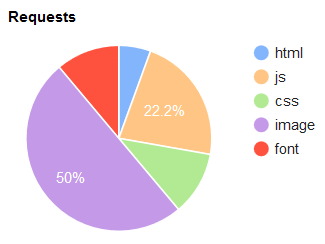
Karin from ScreamBlueMurder has done a great job of writing up a conversation we had about image sizes on web pages. She quite rightly pointed out that although we optimise all the initial content when we build a website, the customer usually has the ability to add their own content after the launch, and may not be aware of the impact of uploading unoptimised images to their site.
I have added some of my thoughts below, but I recommend reading Karin’s article first: Better Browsing: Image Size Matters!

One of the most important things to remember when trying to reduce image file size is to use the appropriate file type for the image:
.pngfor line art, logos etc (basically anything that looks like a vector)..jpgfor photos and everything else.
As Karin mentions, you should use Irfanview (Windows) or ImageOptim (Mac) to optimise images before posting on the web. Both offer the option to do this in batches.
Recommended JPG settings are:
- Remove EXIF metadata (photographers reading this are shouting “NO!” at their screen right now, but to most people, this would be a huge benefit).
- Set quality to 80.
- Save as ‘Progressive JPG‘ (this enables the image to gradually get more detailed as it downloads, rather than having to wait until the whole file is received before it can be displayed).
- PNGs should be saved with compression set to at least 6.
This is just a guide, you may be able to set the quality even lower, but some images may show artefacts and have to be set a little higher at 85/90. Experiment to see what works for different images.
Optimising your images is the easiest step to huge gains in reducing page load times, which can have a direct impact on company profits.
Contact us – we would be happy to provide you with a comprehensive review of your website’s performance including actionable steps to make it faster.